Menus

Thursday, 18 August 2016

Android Programming Tips


INDEX
Converting a string to an integer on Android
Converting a int to an string on Android
Converting a string to an double on Android
Converting a long to an string on Android
Decimal Format
Android Date Format Change
Set the focus on EditText Programmatically
Check If EditText is empty
Preventing going back to the previous activity
Set max-length of EditText programmatically with other InputFilter
String comparison - Android


Converting a string to an integer on Android


int in = Integer.valueOf(et.getText().toString());
//or
int in2 = new Integer(et.getText().toString());


Converting a int to an string o android


int tmpInt = 10;
String tmpStr10 = String.valueOf(tmpInt);

int tmpInt = 10;
String tmpStr10 = Integer.toString(tmpInt);

Converting a string to an double on Android

try this:
double d= Double.parseDouble(yourString);


Converting a long to an string on Android


String strLong = Long.toString(longNumber);


Decimal Format


new DecimalFormat("##,##,##0").format(amount);

Displaying Currency in Indian Numbering Format


Examples:

amount.setText(new DecimalFormat("####0.00").format(amount_item).toString());

or

total.setText(new DecimalFormat("####0.00").format(Double.parseDouble(txtCount.getText().toString()) * amount_item));

Android Date Format Change


SimpleDateFormat sdf = new SimpleDateFormat("yyyy-MM-dd");
String date = sdf.format(new Date());

The date format in sqlite should be of following format:
YYYY-MM-DD
YYYY-MM-DD HH:MM
YYYY-MM-DD HH:MM:SS
YYYY-MM-DD HH:MM:SS.SSS
YYYY-MM-DDTHH:MM
YYYY-MM-DDTHH:MM:SS
YYYY-MM-DDTHH:MM:SS.SSS
HH:MM
HH:MM:SS
HH:MM:SS.SSS
now
DDDDDDDDDD 

For more details, have a look: http://www.sqlite.org/lang_datefunc.html


set the focus on EditText Programmatically


editText = (EditText)findViewById(R.id.myTextViewId); 
editText.requestFocus();


Check If EditText is empty


if(txtNumber.getText().toString().trim().length() == 0){
    Toast.makeText(getApplicationContext(),"Number cannot be blank!" ,Toast.LENGTH_SHORT).show();
    txtNumber.requestFocus();
    return;
}

use the TextUtils class like this :
if(TextUtils.isEmpty(strUserName)) {
    Toast.makeText(this, "plz enter your name ", Toast.LENGTH_SHORT).show();
    return;
}


This example check If EditText is empty and value must be a graterthan zero


if(txtCount.getText().toString().trim().length() == 0 || Integer.parseInt(txtCount.getText().toString()) <1){
    Toast.makeText(getApplicationContext(),"Count cannot be blank!" ,Toast.LENGTH_SHORT).show();
    txtCount.setText("");
    txtCount.requestFocus();
    return;
}


Preventing going back to the previous activity


Following solution can be pretty useful in the usual login / main activity scenario or implementing a blocking screen.
To minimize the app rather than going back to previous activity, you can override onBackPressed() like this:

@Override
public void onBackPressed() {
    moveTaskToBack(true);
}

Another Solutions
LoginActivity on successful login starts the Main activity and this time because the user is logged on, the Main activity will continue its normal course. LoginActivity is declared as following in the manifest file:
<activity android:name="LoginScreen" android:label="@string/app_name"
    android:noHistory="true" android:excludeFromRecents="true">
</activity>
Setting noHistory and excludeFromRecents to true for LoginActivity means that the user cant return to this activity using back button.


Set max-length of EditText programmatically with other InputFilter

Use InputFilter set text length
Limit the character input in an EditText , EditText in XML layout gives us android:maxLength
Try this
txtNumber.setFilters(new InputFilter[]{new InputFilter.LengthFilter(3)});
function
public void setEditTextMaxLength(int length) {
    InputFilter[] FilterArray = new InputFilter[1];
    FilterArray[0] = new InputFilter.LengthFilter(length);
    edt_text.setFilters(FilterArray);
}
EditText et = new EditText(this);
int maxLength = 3;
InputFilter[] FilterArray = new InputFilter[1];
FilterArray[0] = new InputFilter.LengthFilter(maxLength);
et.setFilters(FilterArray);
public void setEditTextMaxLength(final EditText editText, int length) {
    InputFilter[] FilterArray = new InputFilter[1];
    FilterArray[0] = new InputFilter.LengthFilter(length);
    editText.setFilters(FilterArray);
}


String comparison - Android


Check equals

if(item=="ALL"){
    ..........
    ..........
}


Android string comparison for use equal() method to compare the value of the objects.

if(gender.equals("Male"))
 salutation ="Mr.";
if(gender.equals("Female"))
 salutation ="Ms.";

string1.equals(string2)
// returns true if both strings are equal

string1.compareTo(string2)
// returns 0 if both strings are equal


Friday, 5 August 2016

Android SQLite Database example


Android Studio SQLite Database Example


Example demonstrating the use of SQLite Database. 
It creates a basic operations of SQLite database operations.

SQLiteDatabase is a class that allowed us to performCreate, Retrieve , Update, and Delete data (CRUD) operation. In this tutorial we will show you how to useSQLiteDatabase to perform CRUD operation in Android.


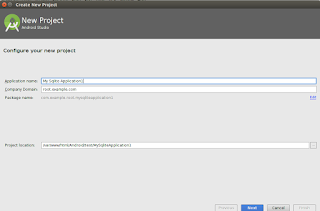
Steps of Create Android Studio 2.1.1 with SQLite Database


You will use Android studio to create an Android application under a package com.example.root.mysqliteapplication1. While creating this project, make sure you Target SDK and Compile With at the latest version of Android SDK to use higher levels of APIs.


Modify src/MainActivity.java file to get references of all the XML components.

Create new class MyDBHandler.java that will manage the database work and Products.java


Tool Used
1. Android Studio 2.1.1
To Do
In this tutorial we will going to create an app that allow to Database operation (Create, Retrieve , Update, and Delete data (CRUD)), product record.

Example

This example shows a very simple example which is to just store important data like product  id and productname using SQLite Database in the android studio.

Screenshot


MainActivity.java.


package com.example.root.mysqliteapplication1;

import android.os.Bundle;
import android.support.design.widget.FloatingActionButton;
import android.support.design.widget.Snackbar;
import android.support.v7.app.AppCompatActivity;
import android.support.v7.widget.Toolbar;
import android.util.Log;
import android.view.View;
import android.view.Menu;
import android.view.MenuItem;
import android.widget.EditText;
import android.widget.TextView;

public class MainActivity extends AppCompatActivity {

// Declare references

    EditText userInput;
    TextView recordsTextView;
    MyDBHandler dbHandler;

    @Override
    protected void onCreate(Bundle savedInstanceState) {
        super.onCreate(savedInstanceState);
        setContentView(R.layout.activity_main);

        userInput = (EditText) findViewById(R.id.buckysInput);
        recordsTextView = (TextView) findViewById(R.id.buckysText);
        /* Can pass nulls because of the constants in the helper.
         * the 1 means version 1 so don't run update.
         */
        dbHandler = new MyDBHandler(this, null, null, 1);
        printDatabase();
    }

    //Print the database results
    public void printDatabase(){
        String dbString = dbHandler.databaseToString();
        recordsTextView.setText(dbString);
        userInput.setText("");
    }

    //add your elements onclick methods.
    //Add a product to the database
    public void addButtonClicked(View view){
        // dbHandler.add needs an object parameter.
        Products product = new Products(userInput.getText().toString());
        dbHandler.addProduct(product);
        printDatabase();
    }

    //Delete items
    public void deleteButtonClicked(View view){
        // dbHandler delete needs string to find in the db
        String inputText = userInput.getText().toString();
        dbHandler.deleteProduct(inputText);
        printDatabase();
    }

}


activity_main.xml


<?xml version="1.0" encoding="utf-8"?>
<android.support.design.widget.CoordinatorLayout xmlns:android="http://schemas.android.com/apk/res/android"
    xmlns:app="http://schemas.android.com/apk/res-auto"
    xmlns:tools="http://schemas.android.com/tools"
    android:layout_width="match_parent"
    android:layout_height="match_parent"
    android:fitsSystemWindows="true"
    tools:context="com.example.root.mysqliteapplication1.MainActivity">

    <android.support.design.widget.AppBarLayout
        android:layout_width="match_parent"
        android:layout_height="wrap_content"
        android:theme="@style/AppTheme.AppBarOverlay">

        <android.support.v7.widget.Toolbar
            android:id="@+id/toolbar"
            android:layout_width="match_parent"
            android:layout_height="?attr/actionBarSize"
            android:background="?attr/colorPrimary"
            app:popupTheme="@style/AppTheme.PopupOverlay" />

    </android.support.design.widget.AppBarLayout>

    <include layout="@layout/content_main" />

    <android.support.design.widget.FloatingActionButton
        android:id="@+id/fab"
        android:layout_width="wrap_content"
        android:layout_height="wrap_content"
        android:layout_gravity="bottom|end"
        android:layout_margin="@dimen/fab_margin"
        android:src="@android:drawable/ic_dialog_email" />

</android.support.design.widget.CoordinatorLayout>

content_main.xml


<?xml version="1.0" encoding="utf-8"?>
<RelativeLayout xmlns:android="http://schemas.android.com/apk/res/android"
    xmlns:app="http://schemas.android.com/apk/res-auto"
    xmlns:tools="http://schemas.android.com/tools"
    android:layout_width="match_parent"
    android:layout_height="match_parent"
    android:paddingBottom="@dimen/activity_vertical_margin"
    android:paddingLeft="@dimen/activity_horizontal_margin"
    android:paddingRight="@dimen/activity_horizontal_margin"
    android:paddingTop="@dimen/activity_vertical_margin"
    app:layout_behavior="@string/appbar_scrolling_view_behavior"
    tools:context="com.example.root.mysqliteapplication1.MainActivity"
    tools:showIn="@layout/activity_main">

    <TextView
        android:layout_width="wrap_content"
        android:layout_height="wrap_content"
        android:text="Basic SQLite Database Operations"
        android:textStyle="bold"
        android:id="@+id/txtHeading"
        android:fontFeatureSettings=" "
        android:background="#f2bcbc" />

    <EditText
        android:layout_width="wrap_content"
        android:layout_height="wrap_content"
        android:id="@+id/buckysInput"
        android:width="300dp"
        android:layout_below="@+id/txtHeading"
        android:layout_marginTop="15dp"
        android:layout_alignParentLeft="true"
        android:layout_alignParentStart="true"
        android:hint="Product Name" />

    <TextView
        android:layout_width="wrap_content"
        android:layout_height="wrap_content"
        android:textAppearance="?android:attr/textAppearanceLarge"
        android:text="Large Text"
        android:id="@+id/buckysText"
        android:layout_below="@+id/txthedingproduct"
        android:layout_alignParentLeft="true"
        android:layout_alignParentStart="true"
        android:layout_alignRight="@+id/deleteButton"
        android:layout_alignEnd="@+id/deleteButton" />

    <Button
        android:layout_width="wrap_content"
        android:layout_height="wrap_content"
        android:text="ADD"
        android:id="@+id/addButton"
        android:onClick="addButtonClicked"
        android:layout_below="@+id/buckysInput"
        android:layout_alignParentLeft="true"
        android:layout_alignParentStart="true" />


    <Button
        android:layout_width="wrap_content"
        android:layout_height="wrap_content"
        android:text="DELETE"
        android:id="@+id/deleteButton"
        android:onClick="deleteButtonClicked"
        android:layout_below="@+id/buckysInput"
        android:layout_toRightOf="@+id/txtHeading"
        android:layout_toEndOf="@+id/txtHeading" />

    <TextView
        android:layout_width="wrap_content"
        android:layout_height="wrap_content"
        android:text="Products List"
        android:id="@+id/txthedingproduct"
        android:fontFeatureSettings=" "
        android:background="#f2bcbc"
        android:layout_below="@+id/addButton"
        android:layout_marginTop="15dp"
        android:textStyle="bold"
        android:layout_alignParentLeft="true"
        android:layout_alignParentStart="true" />

</RelativeLayout>


Products.java


package com.example.root.mysqliteapplication1;


public class Products {
    private int _id;
    private String _productname;

    //Added this empty constructor in lesson 50 in case we ever want to create the object and assign it later.
    public Products(){

    }
    public Products(String productName) {
        this._productname = productName;
    }

    public int get_id() {
        return _id;
    }

    public void set_id(int _id) {
        this._id = _id;
    }

    public String get_productname() {
        return _productname;
    }

    public void set_productname(String _productname) {
        this._productname = _productname;
    }
}


MyDBHandler.java


package com.example.root.mysqliteapplication1;

import android.database.sqlite.SQLiteDatabase;
import android.database.sqlite.SQLiteOpenHelper;
import android.database.Cursor;
import android.content.Context;
import android.content.ContentValues;

public class MyDBHandler extends SQLiteOpenHelper{
    private static final int DATABASE_VERSION = 1;
    private static final String DATABASE_NAME = "productDB.db";
    public static final String TABLE_PRODUCTS = "products";
    public static final String COLUMN_ID = "_id";
    public static final String COLUMN_PRODUCTNAME = "productname";

    //We need to pass database information along to superclass
    public MyDBHandler(Context context, String name, SQLiteDatabase.CursorFactory factory, int version) {
        super(context, DATABASE_NAME, factory, DATABASE_VERSION);
    }

    @Override
    public void onCreate(SQLiteDatabase db) {
        String query = "CREATE TABLE " + TABLE_PRODUCTS + "(" +
                COLUMN_ID + " INTEGER PRIMARY KEY AUTOINCREMENT, " +
                COLUMN_PRODUCTNAME + " TEXT " +
                ");";
        db.execSQL(query);
    }
    //Lesson 51
    @Override
    public void onUpgrade(SQLiteDatabase db, int oldVersion, int newVersion) {
        db.execSQL("DROP TABLE IF EXISTS " + TABLE_PRODUCTS);
        onCreate(db);
    }

    //Add a new row to the database
    public void addProduct(Products product){
        ContentValues values = new ContentValues();
        values.put(COLUMN_PRODUCTNAME, product.get_productname());
        SQLiteDatabase db = getWritableDatabase();
        db.insert(TABLE_PRODUCTS, null, values);
        db.close();
    }

    //Delete a product from the database
    public void deleteProduct(String productName){
        SQLiteDatabase db = getWritableDatabase();
        db.execSQL("DELETE FROM " + TABLE_PRODUCTS + " WHERE " + COLUMN_PRODUCTNAME + "=\"" + productName + "\";");
    }

    // this is goint in record_TextView in the Main activity.
    public String databaseToString(){
        String dbString = "";
        SQLiteDatabase db = getWritableDatabase();
        String query = "SELECT * FROM " + TABLE_PRODUCTS + " WHERE 1";// why not leave out the WHERE  clause?

        //Cursor points to a location in your results
        Cursor recordSet = db.rawQuery(query, null);
        //Move to the first row in your results
        recordSet.moveToFirst();

        //Position after the last row means the end of the results
        while (!recordSet.isAfterLast()) {
            // null could happen if we used our empty constructor
            if (recordSet.getString(recordSet.getColumnIndex("productname")) != null) {
                dbString += recordSet.getString(recordSet.getColumnIndex("productname"));
                dbString += "\n";
            }
            recordSet.moveToNext();
        }
        db.close();
        return dbString;
    }

}


Thursday, 4 August 2016

Saving Data With SQLite


Android - SQLite Database Tutorial


What is SQLite

SQLite is a opensource SQL database that stores data to a text file on a device. Android comes in with built in SQLite database implementation.
SQLite supports all the relational database features. In order to access this database, you don't need to establish any kind of connections for it like JDBC,ODBC e.t.c

SQLite is an in-process library that implements a self-ontainedserverlesszero-configurationtransactional SQL database engine. The code for SQLite is in the public domain and is thus free for use for any purpose, commercial or private.


Features Of SQLite


  • Transactions are atomic, consistent, isolated, and durable (ACID) even after system crashes and power failures.
  • Zero-configuration - no setup or administration needed.
  • Full SQL implementation with advanced features like partial indexes and common table expressions. (Omitted features)
  • A complete database is stored in a single cross-platform disk file. Great for use as an application file format.
  • Supports terabyte-sized databases and gigabyte-sized strings and blobs. (See limits.html.)
  • Small code footprint: less than 500KiB fully configured or much less with optional features omitted.
  • Simple, easy to use API.
  • Written in ANSI-C. TCL bindings included. Bindings for dozens of other languages available separately.
  • Well-commented source code with 100% branch test coverage.
  • Available as a single ANSI-C source-code file that is easy to compile and hence is easy to add into a larger project.
  • Self-contained: no external dependencies.
  • Cross-platform: Android, *BSD, iOS, Linux, Mac, Solaris, VxWorks, and Windows (Win32, WinCE, WinRT) are supported out of the box. Easy to port to other systems.
  • Sources are in the public domain. Use for any purpose.
  • Comes with a standalone command-line interface (CLI) client that can be used to administer SQLite databases.
More details about SQLite


Database - Package

The main package is android.database.sqlite that contains the classes to manage your own databases


Database - Creation


create a database to call this method openOrCreateDatabase with your database name and mode as a parameter. 
It returns an instance of SQLite database which you have to receive in your own object.

Syntax


SQLiteDatabase mydatabase = openOrCreateDatabase("your database name",MODE_PRIVATE,null);


Some other functions available in the database package , that does this job. 
NoMethod & Description
1openDatabase(String path, SQLiteDatabase.CursorFactory factory, int flags, DatabaseErrorHandler errorHandler)
This method only opens the existing database with the appropriate flag mode. The common flags mode could be OPEN_READWRITE OPEN_READONLY
2openDatabase(String path, SQLiteDatabase.CursorFactory factory, int flags)
It is similar to the above method as it also opens the existing database but it does not define any handler to handle the errors of databases
3openOrCreateDatabase(String path, SQLiteDatabase.CursorFactory factory)
It not only opens but create the database if it not exists. This method is equivalent to openDatabase method
4openOrCreateDatabase(File file, SQLiteDatabase.CursorFactory factory)
This method is similar to above method but it takes the File object as a path rather then a string. It is equivalent to file.getPath()


Database - Table Creation and Insertion


create table or insert data into table using execSQL method defined in SQLiteDatabase class

mydatabase.execSQL("CREATE TABLE IF NOT EXISTS yii2ideas (Username VARCHAR,Password VARCHAR);");
mydatabase.execSQL("INSERT INTO yii2ideas VALUES('admin','admin');");


Sr.NoMethod & Description
1execSQL(String sql, Object[] bindArgs)
This method not only insert data , but also used to update or modify already existing data in database using bind arguments


Database - Fetching


Retrieve anything from database using an object of the Cursor class. 
We will call a method of this class called rawQuery and it will return a resultset with the cursor pointing to the table. 
We can move the cursor forward and retrieve the data.

Cursor resultSet = mydatbase.rawQuery("Select * from yii2ideas",null);
resultSet.moveToFirst();
String username = resultSet.getString(1);
String password = resultSet.getString(2);

Some other functions available in the Cursor class that allows us to effectively retrieve the data.

Sr.NoMethod & Description
1getColumnCount()
This method return the total number of columns of the table.
2getColumnIndex(String columnName)
This method returns the index number of a column by specifying the name of the column
3getColumnName(int columnIndex)
This method returns the name of the column by specifying the index of the column
4getColumnNames()
This method returns the array of all the column names of the table.
5getCount()
This method returns the total number of rows in the cursor
6getPosition()
This method returns the current position of the cursor in the table
7isClosed()
This method returns true if the cursor is closed and return false otherwise


Database - Helper class


A helper class to manage database creation and version management.
For managing all the operations related to the database , an helper class has been given and is called SQLiteOpenHelper
It automatically manages the creation and update of the database. 
Syntax
public class DBHelper extends SQLiteOpenHelper {
   public DBHelper(){
      super(context,DATABASE_NAME,null,1);
   }
   public void onCreate(SQLiteDatabase db) {}
   public void onUpgrade(SQLiteDatabase database, int oldVersion, int newVersion) {}
}


Other SQLite Examples


Insert null in Sqlite table


CREATE TABLE your_table_name
(MainContactName TEXT NOT NULL DEFAULT '')

CREATE TABLE book(_id INTEGER PRIMARY KEY AUTOINCREMENT,book TEXT DEFAULT "abc");

String sql = "CREATE TABLE IF NOT EXISTS " + TABLE_QUEST + " ( "        + KEY_ID + " INTEGER PRIMARY KEY AUTOINCREMENT, " + KEY_QUES        + " TEXT, " + KEY_ANSWER+ " TEXT, "+KEY_OPTA +" TEXT NULL, "        +KEY_OPTB +" TEXT NULL, "+KEY_OPTC+" TEXT NULL)";
db.execSQL(sql);