Menus

Thursday 1 September 2016

YII2 CRUD Operations code with Gii

What is CRUD


CRUD stands for Create, Read, Update, and Delete, representing the four common tasks taken with data on most Web sites. CRUD Generator generates a controller and views that implement CRUD operations for the specified data model.

What is Gii?

Gii is web-based code generator. 
With Gii we can quickly generate models, forms, modules, CRUD, etc.. 

How to use Gii


In our environment we can use Gii web-based interface by going to this address:
http://localhost/project-folder/backend/web/index.php?r=gii
You should see:


Model Generator

This generator generates an ActiveRecord class for the specified database table.
CRUD Generator
This generator generates a controller and views that implement CRUD (Create, Read, Update, Delete) operations for the specified data model.

Controller Generator

This generator helps you to quickly generate a new controller class with one or several controller actions and their corresponding views.

Form Generator

This generator generates a view script file that displays a form to collect input for the specified model class.

Module Generator

This generator helps you to generate the skeleton code needed by a Yii module.

Extension Generator

This generator helps you to generate the files needed by a Yii extension.

How to use Gii and Generating CRUD code


We can generate CRUD code directly in the Gii code generator. To go to CRUD generator click on the “CRUD Generator” button or go to this address:
http://localhost/project-folder/backend/web/index.php?r=gii%2Fdefault%2Fview&id=crud

There are several form fields which we have to fill:

Model class - This is the ActiveRecord class associated with the table that CRUD will be built upon.
Search Model Class - This is the name of the search model class to be generated.
Controller Class - This is the name of the controller class to be generated.
View Path - Specify the directory for storing the view scripts for the controller.
Widget Used in Index Page - This is the widget type to be used in the index page to display list of the models.


Note : Please add your valuable comments and add your tutorial links in comments column for helps to others..

Thursday 18 August 2016

Android Programming Tips


INDEX
Converting a string to an integer on Android
Converting a int to an string on Android
Converting a string to an double on Android
Converting a long to an string on Android
Decimal Format
Android Date Format Change
Set the focus on EditText Programmatically
Check If EditText is empty
Preventing going back to the previous activity
Set max-length of EditText programmatically with other InputFilter
String comparison - Android


Converting a string to an integer on Android


int in = Integer.valueOf(et.getText().toString());
//or
int in2 = new Integer(et.getText().toString());


Converting a int to an string o android


int tmpInt = 10;
String tmpStr10 = String.valueOf(tmpInt);

int tmpInt = 10;
String tmpStr10 = Integer.toString(tmpInt);

Converting a string to an double on Android

try this:
double d= Double.parseDouble(yourString);


Converting a long to an string on Android


String strLong = Long.toString(longNumber);


Decimal Format


new DecimalFormat("##,##,##0").format(amount);

Displaying Currency in Indian Numbering Format


Examples:

amount.setText(new DecimalFormat("####0.00").format(amount_item).toString());

or

total.setText(new DecimalFormat("####0.00").format(Double.parseDouble(txtCount.getText().toString()) * amount_item));

Android Date Format Change


SimpleDateFormat sdf = new SimpleDateFormat("yyyy-MM-dd");
String date = sdf.format(new Date());

The date format in sqlite should be of following format:
YYYY-MM-DD
YYYY-MM-DD HH:MM
YYYY-MM-DD HH:MM:SS
YYYY-MM-DD HH:MM:SS.SSS
YYYY-MM-DDTHH:MM
YYYY-MM-DDTHH:MM:SS
YYYY-MM-DDTHH:MM:SS.SSS
HH:MM
HH:MM:SS
HH:MM:SS.SSS
now
DDDDDDDDDD 

For more details, have a look: http://www.sqlite.org/lang_datefunc.html


set the focus on EditText Programmatically


editText = (EditText)findViewById(R.id.myTextViewId); 
editText.requestFocus();


Check If EditText is empty


if(txtNumber.getText().toString().trim().length() == 0){
    Toast.makeText(getApplicationContext(),"Number cannot be blank!" ,Toast.LENGTH_SHORT).show();
    txtNumber.requestFocus();
    return;
}

use the TextUtils class like this :
if(TextUtils.isEmpty(strUserName)) {
    Toast.makeText(this, "plz enter your name ", Toast.LENGTH_SHORT).show();
    return;
}


This example check If EditText is empty and value must be a graterthan zero


if(txtCount.getText().toString().trim().length() == 0 || Integer.parseInt(txtCount.getText().toString()) <1){
    Toast.makeText(getApplicationContext(),"Count cannot be blank!" ,Toast.LENGTH_SHORT).show();
    txtCount.setText("");
    txtCount.requestFocus();
    return;
}


Preventing going back to the previous activity


Following solution can be pretty useful in the usual login / main activity scenario or implementing a blocking screen.
To minimize the app rather than going back to previous activity, you can override onBackPressed() like this:

@Override
public void onBackPressed() {
    moveTaskToBack(true);
}

Another Solutions
LoginActivity on successful login starts the Main activity and this time because the user is logged on, the Main activity will continue its normal course. LoginActivity is declared as following in the manifest file:
<activity android:name="LoginScreen" android:label="@string/app_name"
    android:noHistory="true" android:excludeFromRecents="true">
</activity>
Setting noHistory and excludeFromRecents to true for LoginActivity means that the user cant return to this activity using back button.


Set max-length of EditText programmatically with other InputFilter

Use InputFilter set text length
Limit the character input in an EditText , EditText in XML layout gives us android:maxLength
Try this
txtNumber.setFilters(new InputFilter[]{new InputFilter.LengthFilter(3)});
function
public void setEditTextMaxLength(int length) {
    InputFilter[] FilterArray = new InputFilter[1];
    FilterArray[0] = new InputFilter.LengthFilter(length);
    edt_text.setFilters(FilterArray);
}
EditText et = new EditText(this);
int maxLength = 3;
InputFilter[] FilterArray = new InputFilter[1];
FilterArray[0] = new InputFilter.LengthFilter(maxLength);
et.setFilters(FilterArray);
public void setEditTextMaxLength(final EditText editText, int length) {
    InputFilter[] FilterArray = new InputFilter[1];
    FilterArray[0] = new InputFilter.LengthFilter(length);
    editText.setFilters(FilterArray);
}


String comparison - Android


Check equals

if(item=="ALL"){
    ..........
    ..........
}


Android string comparison for use equal() method to compare the value of the objects.

if(gender.equals("Male"))
 salutation ="Mr.";
if(gender.equals("Female"))
 salutation ="Ms.";

string1.equals(string2)
// returns true if both strings are equal

string1.compareTo(string2)
// returns 0 if both strings are equal


Friday 5 August 2016

Android SQLite Database example


Android Studio SQLite Database Example


Example demonstrating the use of SQLite Database. 
It creates a basic operations of SQLite database operations.

SQLiteDatabase is a class that allowed us to performCreate, Retrieve , Update, and Delete data (CRUD) operation. In this tutorial we will show you how to useSQLiteDatabase to perform CRUD operation in Android.


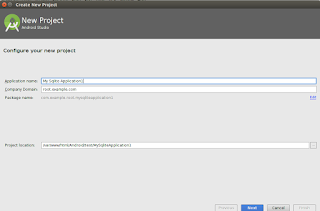
Steps of Create Android Studio 2.1.1 with SQLite Database


You will use Android studio to create an Android application under a package com.example.root.mysqliteapplication1. While creating this project, make sure you Target SDK and Compile With at the latest version of Android SDK to use higher levels of APIs.


Modify src/MainActivity.java file to get references of all the XML components.

Create new class MyDBHandler.java that will manage the database work and Products.java


Tool Used
1. Android Studio 2.1.1
To Do
In this tutorial we will going to create an app that allow to Database operation (Create, Retrieve , Update, and Delete data (CRUD)), product record.

Example

This example shows a very simple example which is to just store important data like product  id and productname using SQLite Database in the android studio.

Screenshot


MainActivity.java.


package com.example.root.mysqliteapplication1;

import android.os.Bundle;
import android.support.design.widget.FloatingActionButton;
import android.support.design.widget.Snackbar;
import android.support.v7.app.AppCompatActivity;
import android.support.v7.widget.Toolbar;
import android.util.Log;
import android.view.View;
import android.view.Menu;
import android.view.MenuItem;
import android.widget.EditText;
import android.widget.TextView;

public class MainActivity extends AppCompatActivity {

// Declare references

    EditText userInput;
    TextView recordsTextView;
    MyDBHandler dbHandler;

    @Override
    protected void onCreate(Bundle savedInstanceState) {
        super.onCreate(savedInstanceState);
        setContentView(R.layout.activity_main);

        userInput = (EditText) findViewById(R.id.buckysInput);
        recordsTextView = (TextView) findViewById(R.id.buckysText);
        /* Can pass nulls because of the constants in the helper.
         * the 1 means version 1 so don't run update.
         */
        dbHandler = new MyDBHandler(this, null, null, 1);
        printDatabase();
    }

    //Print the database results
    public void printDatabase(){
        String dbString = dbHandler.databaseToString();
        recordsTextView.setText(dbString);
        userInput.setText("");
    }

    //add your elements onclick methods.
    //Add a product to the database
    public void addButtonClicked(View view){
        // dbHandler.add needs an object parameter.
        Products product = new Products(userInput.getText().toString());
        dbHandler.addProduct(product);
        printDatabase();
    }

    //Delete items
    public void deleteButtonClicked(View view){
        // dbHandler delete needs string to find in the db
        String inputText = userInput.getText().toString();
        dbHandler.deleteProduct(inputText);
        printDatabase();
    }

}


activity_main.xml


<?xml version="1.0" encoding="utf-8"?>
<android.support.design.widget.CoordinatorLayout xmlns:android="http://schemas.android.com/apk/res/android"
    xmlns:app="http://schemas.android.com/apk/res-auto"
    xmlns:tools="http://schemas.android.com/tools"
    android:layout_width="match_parent"
    android:layout_height="match_parent"
    android:fitsSystemWindows="true"
    tools:context="com.example.root.mysqliteapplication1.MainActivity">

    <android.support.design.widget.AppBarLayout
        android:layout_width="match_parent"
        android:layout_height="wrap_content"
        android:theme="@style/AppTheme.AppBarOverlay">

        <android.support.v7.widget.Toolbar
            android:id="@+id/toolbar"
            android:layout_width="match_parent"
            android:layout_height="?attr/actionBarSize"
            android:background="?attr/colorPrimary"
            app:popupTheme="@style/AppTheme.PopupOverlay" />

    </android.support.design.widget.AppBarLayout>

    <include layout="@layout/content_main" />

    <android.support.design.widget.FloatingActionButton
        android:id="@+id/fab"
        android:layout_width="wrap_content"
        android:layout_height="wrap_content"
        android:layout_gravity="bottom|end"
        android:layout_margin="@dimen/fab_margin"
        android:src="@android:drawable/ic_dialog_email" />

</android.support.design.widget.CoordinatorLayout>

content_main.xml


<?xml version="1.0" encoding="utf-8"?>
<RelativeLayout xmlns:android="http://schemas.android.com/apk/res/android"
    xmlns:app="http://schemas.android.com/apk/res-auto"
    xmlns:tools="http://schemas.android.com/tools"
    android:layout_width="match_parent"
    android:layout_height="match_parent"
    android:paddingBottom="@dimen/activity_vertical_margin"
    android:paddingLeft="@dimen/activity_horizontal_margin"
    android:paddingRight="@dimen/activity_horizontal_margin"
    android:paddingTop="@dimen/activity_vertical_margin"
    app:layout_behavior="@string/appbar_scrolling_view_behavior"
    tools:context="com.example.root.mysqliteapplication1.MainActivity"
    tools:showIn="@layout/activity_main">

    <TextView
        android:layout_width="wrap_content"
        android:layout_height="wrap_content"
        android:text="Basic SQLite Database Operations"
        android:textStyle="bold"
        android:id="@+id/txtHeading"
        android:fontFeatureSettings=" "
        android:background="#f2bcbc" />

    <EditText
        android:layout_width="wrap_content"
        android:layout_height="wrap_content"
        android:id="@+id/buckysInput"
        android:width="300dp"
        android:layout_below="@+id/txtHeading"
        android:layout_marginTop="15dp"
        android:layout_alignParentLeft="true"
        android:layout_alignParentStart="true"
        android:hint="Product Name" />

    <TextView
        android:layout_width="wrap_content"
        android:layout_height="wrap_content"
        android:textAppearance="?android:attr/textAppearanceLarge"
        android:text="Large Text"
        android:id="@+id/buckysText"
        android:layout_below="@+id/txthedingproduct"
        android:layout_alignParentLeft="true"
        android:layout_alignParentStart="true"
        android:layout_alignRight="@+id/deleteButton"
        android:layout_alignEnd="@+id/deleteButton" />

    <Button
        android:layout_width="wrap_content"
        android:layout_height="wrap_content"
        android:text="ADD"
        android:id="@+id/addButton"
        android:onClick="addButtonClicked"
        android:layout_below="@+id/buckysInput"
        android:layout_alignParentLeft="true"
        android:layout_alignParentStart="true" />


    <Button
        android:layout_width="wrap_content"
        android:layout_height="wrap_content"
        android:text="DELETE"
        android:id="@+id/deleteButton"
        android:onClick="deleteButtonClicked"
        android:layout_below="@+id/buckysInput"
        android:layout_toRightOf="@+id/txtHeading"
        android:layout_toEndOf="@+id/txtHeading" />

    <TextView
        android:layout_width="wrap_content"
        android:layout_height="wrap_content"
        android:text="Products List"
        android:id="@+id/txthedingproduct"
        android:fontFeatureSettings=" "
        android:background="#f2bcbc"
        android:layout_below="@+id/addButton"
        android:layout_marginTop="15dp"
        android:textStyle="bold"
        android:layout_alignParentLeft="true"
        android:layout_alignParentStart="true" />

</RelativeLayout>


Products.java


package com.example.root.mysqliteapplication1;


public class Products {
    private int _id;
    private String _productname;

    //Added this empty constructor in lesson 50 in case we ever want to create the object and assign it later.
    public Products(){

    }
    public Products(String productName) {
        this._productname = productName;
    }

    public int get_id() {
        return _id;
    }

    public void set_id(int _id) {
        this._id = _id;
    }

    public String get_productname() {
        return _productname;
    }

    public void set_productname(String _productname) {
        this._productname = _productname;
    }
}


MyDBHandler.java


package com.example.root.mysqliteapplication1;

import android.database.sqlite.SQLiteDatabase;
import android.database.sqlite.SQLiteOpenHelper;
import android.database.Cursor;
import android.content.Context;
import android.content.ContentValues;

public class MyDBHandler extends SQLiteOpenHelper{
    private static final int DATABASE_VERSION = 1;
    private static final String DATABASE_NAME = "productDB.db";
    public static final String TABLE_PRODUCTS = "products";
    public static final String COLUMN_ID = "_id";
    public static final String COLUMN_PRODUCTNAME = "productname";

    //We need to pass database information along to superclass
    public MyDBHandler(Context context, String name, SQLiteDatabase.CursorFactory factory, int version) {
        super(context, DATABASE_NAME, factory, DATABASE_VERSION);
    }

    @Override
    public void onCreate(SQLiteDatabase db) {
        String query = "CREATE TABLE " + TABLE_PRODUCTS + "(" +
                COLUMN_ID + " INTEGER PRIMARY KEY AUTOINCREMENT, " +
                COLUMN_PRODUCTNAME + " TEXT " +
                ");";
        db.execSQL(query);
    }
    //Lesson 51
    @Override
    public void onUpgrade(SQLiteDatabase db, int oldVersion, int newVersion) {
        db.execSQL("DROP TABLE IF EXISTS " + TABLE_PRODUCTS);
        onCreate(db);
    }

    //Add a new row to the database
    public void addProduct(Products product){
        ContentValues values = new ContentValues();
        values.put(COLUMN_PRODUCTNAME, product.get_productname());
        SQLiteDatabase db = getWritableDatabase();
        db.insert(TABLE_PRODUCTS, null, values);
        db.close();
    }

    //Delete a product from the database
    public void deleteProduct(String productName){
        SQLiteDatabase db = getWritableDatabase();
        db.execSQL("DELETE FROM " + TABLE_PRODUCTS + " WHERE " + COLUMN_PRODUCTNAME + "=\"" + productName + "\";");
    }

    // this is goint in record_TextView in the Main activity.
    public String databaseToString(){
        String dbString = "";
        SQLiteDatabase db = getWritableDatabase();
        String query = "SELECT * FROM " + TABLE_PRODUCTS + " WHERE 1";// why not leave out the WHERE  clause?

        //Cursor points to a location in your results
        Cursor recordSet = db.rawQuery(query, null);
        //Move to the first row in your results
        recordSet.moveToFirst();

        //Position after the last row means the end of the results
        while (!recordSet.isAfterLast()) {
            // null could happen if we used our empty constructor
            if (recordSet.getString(recordSet.getColumnIndex("productname")) != null) {
                dbString += recordSet.getString(recordSet.getColumnIndex("productname"));
                dbString += "\n";
            }
            recordSet.moveToNext();
        }
        db.close();
        return dbString;
    }

}