Menus

Friday 5 August 2016

Android SQLite Database example


Android Studio SQLite Database Example


Example demonstrating the use of SQLite Database. 
It creates a basic operations of SQLite database operations.

SQLiteDatabase is a class that allowed us to performCreate, Retrieve , Update, and Delete data (CRUD) operation. In this tutorial we will show you how to useSQLiteDatabase to perform CRUD operation in Android.


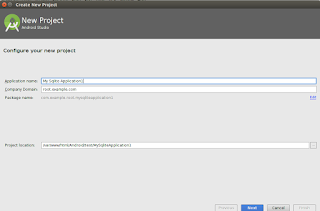
Steps of Create Android Studio 2.1.1 with SQLite Database


You will use Android studio to create an Android application under a package com.example.root.mysqliteapplication1. While creating this project, make sure you Target SDK and Compile With at the latest version of Android SDK to use higher levels of APIs.


Modify src/MainActivity.java file to get references of all the XML components.

Create new class MyDBHandler.java that will manage the database work and Products.java


Tool Used
1. Android Studio 2.1.1
To Do
In this tutorial we will going to create an app that allow to Database operation (Create, Retrieve , Update, and Delete data (CRUD)), product record.

Example

This example shows a very simple example which is to just store important data like product  id and productname using SQLite Database in the android studio.

Screenshot


MainActivity.java.


package com.example.root.mysqliteapplication1;

import android.os.Bundle;
import android.support.design.widget.FloatingActionButton;
import android.support.design.widget.Snackbar;
import android.support.v7.app.AppCompatActivity;
import android.support.v7.widget.Toolbar;
import android.util.Log;
import android.view.View;
import android.view.Menu;
import android.view.MenuItem;
import android.widget.EditText;
import android.widget.TextView;

public class MainActivity extends AppCompatActivity {

// Declare references

    EditText userInput;
    TextView recordsTextView;
    MyDBHandler dbHandler;

    @Override
    protected void onCreate(Bundle savedInstanceState) {
        super.onCreate(savedInstanceState);
        setContentView(R.layout.activity_main);

        userInput = (EditText) findViewById(R.id.buckysInput);
        recordsTextView = (TextView) findViewById(R.id.buckysText);
        /* Can pass nulls because of the constants in the helper.
         * the 1 means version 1 so don't run update.
         */
        dbHandler = new MyDBHandler(this, null, null, 1);
        printDatabase();
    }

    //Print the database results
    public void printDatabase(){
        String dbString = dbHandler.databaseToString();
        recordsTextView.setText(dbString);
        userInput.setText("");
    }

    //add your elements onclick methods.
    //Add a product to the database
    public void addButtonClicked(View view){
        // dbHandler.add needs an object parameter.
        Products product = new Products(userInput.getText().toString());
        dbHandler.addProduct(product);
        printDatabase();
    }

    //Delete items
    public void deleteButtonClicked(View view){
        // dbHandler delete needs string to find in the db
        String inputText = userInput.getText().toString();
        dbHandler.deleteProduct(inputText);
        printDatabase();
    }

}


activity_main.xml


<?xml version="1.0" encoding="utf-8"?>
<android.support.design.widget.CoordinatorLayout xmlns:android="http://schemas.android.com/apk/res/android"
    xmlns:app="http://schemas.android.com/apk/res-auto"
    xmlns:tools="http://schemas.android.com/tools"
    android:layout_width="match_parent"
    android:layout_height="match_parent"
    android:fitsSystemWindows="true"
    tools:context="com.example.root.mysqliteapplication1.MainActivity">

    <android.support.design.widget.AppBarLayout
        android:layout_width="match_parent"
        android:layout_height="wrap_content"
        android:theme="@style/AppTheme.AppBarOverlay">

        <android.support.v7.widget.Toolbar
            android:id="@+id/toolbar"
            android:layout_width="match_parent"
            android:layout_height="?attr/actionBarSize"
            android:background="?attr/colorPrimary"
            app:popupTheme="@style/AppTheme.PopupOverlay" />

    </android.support.design.widget.AppBarLayout>

    <include layout="@layout/content_main" />

    <android.support.design.widget.FloatingActionButton
        android:id="@+id/fab"
        android:layout_width="wrap_content"
        android:layout_height="wrap_content"
        android:layout_gravity="bottom|end"
        android:layout_margin="@dimen/fab_margin"
        android:src="@android:drawable/ic_dialog_email" />

</android.support.design.widget.CoordinatorLayout>

content_main.xml


<?xml version="1.0" encoding="utf-8"?>
<RelativeLayout xmlns:android="http://schemas.android.com/apk/res/android"
    xmlns:app="http://schemas.android.com/apk/res-auto"
    xmlns:tools="http://schemas.android.com/tools"
    android:layout_width="match_parent"
    android:layout_height="match_parent"
    android:paddingBottom="@dimen/activity_vertical_margin"
    android:paddingLeft="@dimen/activity_horizontal_margin"
    android:paddingRight="@dimen/activity_horizontal_margin"
    android:paddingTop="@dimen/activity_vertical_margin"
    app:layout_behavior="@string/appbar_scrolling_view_behavior"
    tools:context="com.example.root.mysqliteapplication1.MainActivity"
    tools:showIn="@layout/activity_main">

    <TextView
        android:layout_width="wrap_content"
        android:layout_height="wrap_content"
        android:text="Basic SQLite Database Operations"
        android:textStyle="bold"
        android:id="@+id/txtHeading"
        android:fontFeatureSettings=" "
        android:background="#f2bcbc" />

    <EditText
        android:layout_width="wrap_content"
        android:layout_height="wrap_content"
        android:id="@+id/buckysInput"
        android:width="300dp"
        android:layout_below="@+id/txtHeading"
        android:layout_marginTop="15dp"
        android:layout_alignParentLeft="true"
        android:layout_alignParentStart="true"
        android:hint="Product Name" />

    <TextView
        android:layout_width="wrap_content"
        android:layout_height="wrap_content"
        android:textAppearance="?android:attr/textAppearanceLarge"
        android:text="Large Text"
        android:id="@+id/buckysText"
        android:layout_below="@+id/txthedingproduct"
        android:layout_alignParentLeft="true"
        android:layout_alignParentStart="true"
        android:layout_alignRight="@+id/deleteButton"
        android:layout_alignEnd="@+id/deleteButton" />

    <Button
        android:layout_width="wrap_content"
        android:layout_height="wrap_content"
        android:text="ADD"
        android:id="@+id/addButton"
        android:onClick="addButtonClicked"
        android:layout_below="@+id/buckysInput"
        android:layout_alignParentLeft="true"
        android:layout_alignParentStart="true" />


    <Button
        android:layout_width="wrap_content"
        android:layout_height="wrap_content"
        android:text="DELETE"
        android:id="@+id/deleteButton"
        android:onClick="deleteButtonClicked"
        android:layout_below="@+id/buckysInput"
        android:layout_toRightOf="@+id/txtHeading"
        android:layout_toEndOf="@+id/txtHeading" />

    <TextView
        android:layout_width="wrap_content"
        android:layout_height="wrap_content"
        android:text="Products List"
        android:id="@+id/txthedingproduct"
        android:fontFeatureSettings=" "
        android:background="#f2bcbc"
        android:layout_below="@+id/addButton"
        android:layout_marginTop="15dp"
        android:textStyle="bold"
        android:layout_alignParentLeft="true"
        android:layout_alignParentStart="true" />

</RelativeLayout>


Products.java


package com.example.root.mysqliteapplication1;


public class Products {
    private int _id;
    private String _productname;

    //Added this empty constructor in lesson 50 in case we ever want to create the object and assign it later.
    public Products(){

    }
    public Products(String productName) {
        this._productname = productName;
    }

    public int get_id() {
        return _id;
    }

    public void set_id(int _id) {
        this._id = _id;
    }

    public String get_productname() {
        return _productname;
    }

    public void set_productname(String _productname) {
        this._productname = _productname;
    }
}


MyDBHandler.java


package com.example.root.mysqliteapplication1;

import android.database.sqlite.SQLiteDatabase;
import android.database.sqlite.SQLiteOpenHelper;
import android.database.Cursor;
import android.content.Context;
import android.content.ContentValues;

public class MyDBHandler extends SQLiteOpenHelper{
    private static final int DATABASE_VERSION = 1;
    private static final String DATABASE_NAME = "productDB.db";
    public static final String TABLE_PRODUCTS = "products";
    public static final String COLUMN_ID = "_id";
    public static final String COLUMN_PRODUCTNAME = "productname";

    //We need to pass database information along to superclass
    public MyDBHandler(Context context, String name, SQLiteDatabase.CursorFactory factory, int version) {
        super(context, DATABASE_NAME, factory, DATABASE_VERSION);
    }

    @Override
    public void onCreate(SQLiteDatabase db) {
        String query = "CREATE TABLE " + TABLE_PRODUCTS + "(" +
                COLUMN_ID + " INTEGER PRIMARY KEY AUTOINCREMENT, " +
                COLUMN_PRODUCTNAME + " TEXT " +
                ");";
        db.execSQL(query);
    }
    //Lesson 51
    @Override
    public void onUpgrade(SQLiteDatabase db, int oldVersion, int newVersion) {
        db.execSQL("DROP TABLE IF EXISTS " + TABLE_PRODUCTS);
        onCreate(db);
    }

    //Add a new row to the database
    public void addProduct(Products product){
        ContentValues values = new ContentValues();
        values.put(COLUMN_PRODUCTNAME, product.get_productname());
        SQLiteDatabase db = getWritableDatabase();
        db.insert(TABLE_PRODUCTS, null, values);
        db.close();
    }

    //Delete a product from the database
    public void deleteProduct(String productName){
        SQLiteDatabase db = getWritableDatabase();
        db.execSQL("DELETE FROM " + TABLE_PRODUCTS + " WHERE " + COLUMN_PRODUCTNAME + "=\"" + productName + "\";");
    }

    // this is goint in record_TextView in the Main activity.
    public String databaseToString(){
        String dbString = "";
        SQLiteDatabase db = getWritableDatabase();
        String query = "SELECT * FROM " + TABLE_PRODUCTS + " WHERE 1";// why not leave out the WHERE  clause?

        //Cursor points to a location in your results
        Cursor recordSet = db.rawQuery(query, null);
        //Move to the first row in your results
        recordSet.moveToFirst();

        //Position after the last row means the end of the results
        while (!recordSet.isAfterLast()) {
            // null could happen if we used our empty constructor
            if (recordSet.getString(recordSet.getColumnIndex("productname")) != null) {
                dbString += recordSet.getString(recordSet.getColumnIndex("productname"));
                dbString += "\n";
            }
            recordSet.moveToNext();
        }
        db.close();
        return dbString;
    }

}


Thursday 4 August 2016

Saving Data With SQLite


Android - SQLite Database Tutorial


What is SQLite

SQLite is a opensource SQL database that stores data to a text file on a device. Android comes in with built in SQLite database implementation.
SQLite supports all the relational database features. In order to access this database, you don't need to establish any kind of connections for it like JDBC,ODBC e.t.c

SQLite is an in-process library that implements a self-ontainedserverlesszero-configurationtransactional SQL database engine. The code for SQLite is in the public domain and is thus free for use for any purpose, commercial or private.


Features Of SQLite


  • Transactions are atomic, consistent, isolated, and durable (ACID) even after system crashes and power failures.
  • Zero-configuration - no setup or administration needed.
  • Full SQL implementation with advanced features like partial indexes and common table expressions. (Omitted features)
  • A complete database is stored in a single cross-platform disk file. Great for use as an application file format.
  • Supports terabyte-sized databases and gigabyte-sized strings and blobs. (See limits.html.)
  • Small code footprint: less than 500KiB fully configured or much less with optional features omitted.
  • Simple, easy to use API.
  • Written in ANSI-C. TCL bindings included. Bindings for dozens of other languages available separately.
  • Well-commented source code with 100% branch test coverage.
  • Available as a single ANSI-C source-code file that is easy to compile and hence is easy to add into a larger project.
  • Self-contained: no external dependencies.
  • Cross-platform: Android, *BSD, iOS, Linux, Mac, Solaris, VxWorks, and Windows (Win32, WinCE, WinRT) are supported out of the box. Easy to port to other systems.
  • Sources are in the public domain. Use for any purpose.
  • Comes with a standalone command-line interface (CLI) client that can be used to administer SQLite databases.
More details about SQLite


Database - Package

The main package is android.database.sqlite that contains the classes to manage your own databases


Database - Creation


create a database to call this method openOrCreateDatabase with your database name and mode as a parameter. 
It returns an instance of SQLite database which you have to receive in your own object.

Syntax


SQLiteDatabase mydatabase = openOrCreateDatabase("your database name",MODE_PRIVATE,null);


Some other functions available in the database package , that does this job. 
NoMethod & Description
1openDatabase(String path, SQLiteDatabase.CursorFactory factory, int flags, DatabaseErrorHandler errorHandler)
This method only opens the existing database with the appropriate flag mode. The common flags mode could be OPEN_READWRITE OPEN_READONLY
2openDatabase(String path, SQLiteDatabase.CursorFactory factory, int flags)
It is similar to the above method as it also opens the existing database but it does not define any handler to handle the errors of databases
3openOrCreateDatabase(String path, SQLiteDatabase.CursorFactory factory)
It not only opens but create the database if it not exists. This method is equivalent to openDatabase method
4openOrCreateDatabase(File file, SQLiteDatabase.CursorFactory factory)
This method is similar to above method but it takes the File object as a path rather then a string. It is equivalent to file.getPath()


Database - Table Creation and Insertion


create table or insert data into table using execSQL method defined in SQLiteDatabase class

mydatabase.execSQL("CREATE TABLE IF NOT EXISTS yii2ideas (Username VARCHAR,Password VARCHAR);");
mydatabase.execSQL("INSERT INTO yii2ideas VALUES('admin','admin');");


Sr.NoMethod & Description
1execSQL(String sql, Object[] bindArgs)
This method not only insert data , but also used to update or modify already existing data in database using bind arguments


Database - Fetching


Retrieve anything from database using an object of the Cursor class. 
We will call a method of this class called rawQuery and it will return a resultset with the cursor pointing to the table. 
We can move the cursor forward and retrieve the data.

Cursor resultSet = mydatbase.rawQuery("Select * from yii2ideas",null);
resultSet.moveToFirst();
String username = resultSet.getString(1);
String password = resultSet.getString(2);

Some other functions available in the Cursor class that allows us to effectively retrieve the data.

Sr.NoMethod & Description
1getColumnCount()
This method return the total number of columns of the table.
2getColumnIndex(String columnName)
This method returns the index number of a column by specifying the name of the column
3getColumnName(int columnIndex)
This method returns the name of the column by specifying the index of the column
4getColumnNames()
This method returns the array of all the column names of the table.
5getCount()
This method returns the total number of rows in the cursor
6getPosition()
This method returns the current position of the cursor in the table
7isClosed()
This method returns true if the cursor is closed and return false otherwise


Database - Helper class


A helper class to manage database creation and version management.
For managing all the operations related to the database , an helper class has been given and is called SQLiteOpenHelper
It automatically manages the creation and update of the database. 
Syntax
public class DBHelper extends SQLiteOpenHelper {
   public DBHelper(){
      super(context,DATABASE_NAME,null,1);
   }
   public void onCreate(SQLiteDatabase db) {}
   public void onUpgrade(SQLiteDatabase database, int oldVersion, int newVersion) {}
}


Other SQLite Examples


Insert null in Sqlite table


CREATE TABLE your_table_name
(MainContactName TEXT NOT NULL DEFAULT '')

CREATE TABLE book(_id INTEGER PRIMARY KEY AUTOINCREMENT,book TEXT DEFAULT "abc");

String sql = "CREATE TABLE IF NOT EXISTS " + TABLE_QUEST + " ( "        + KEY_ID + " INTEGER PRIMARY KEY AUTOINCREMENT, " + KEY_QUES        + " TEXT, " + KEY_ANSWER+ " TEXT, "+KEY_OPTA +" TEXT NULL, "        +KEY_OPTB +" TEXT NULL, "+KEY_OPTC+" TEXT NULL)";
db.execSQL(sql);


Thursday 7 July 2016

Event Handling in Android


Event Handling in Android


Events are a useful way to collect data about a user's interaction with interactive components of Applications.Like button presses or screen touch etc. The Android framework maintains an event queue as first-in, first-out (FIFO) basis.


There are following three concepts related to Android Event Management −
  • Event Listeners − An event listener is an interface in the View class that contains a single callback method. These methods will be called by the Android framework when the View to which the listener has been registered is triggered by user interaction with the item in the UI.
  • Event Listeners Registration − Event Registration is the process by which an Event Handler gets registered with an Event Listener so that the handler is called when the Event Listener fires the event.
  • Event Handlers − When an event happens and we have registered an event listener for the event, the event listener calls the Event Handlers, which is the method that actually handles the event.

Event Listeners & Event Handlers

Event HandlerEvent Listener & Description
onClick()OnClickListener()
This is called when the user either clicks or touches or focuses upon any widget like button, text, image etc. You will use onClick() event handler to handle such event.
onLongClick()OnLongClickListener()
This is called when the user either clicks or touches or focuses upon any widget like button, text, image etc. for one or more seconds. You will use onLongClick() event handler to handle such event.
onFocusChange()OnFocusChangeListener()
This is called when the widget looses its focus ie. user goes away from the view item. You will use onFocusChange() event handler to handle such event.
onKey()OnFocusChangeListener()
This is called when the user is focused on the item and presses or releases a hardware key on the device. You will use onKey() event handler to handle such event.
onTouch()OnTouchListener()
This is called when the user presses the key, releases the key, or any movement gesture on the screen. You will use onTouch() event handler to handle such event.
onMenuItemClick()OnMenuItemClickListener()
This is called when the user selects a menu item. You will use onMenuItemClick() event handler to handle such event.
onCreateContextMenu()onCreateContextMenuItemListener()
This is called when the context menu is being built(as the result of a sustained "long click)

There are many more event listeners available as a part of View class like OnHoverListener, OnDragListener etc


Example of Button Click and LongClick


This example includes


 Event Handling in android

 Event Listener and call back method in android

 Add Multiple Event Listener in android


Start project

Create blank Activity named as Event2Activity
Button and textview placed on Activity window.


Event2Activity.java File

package com.example.root.mysecondapplication;

import android.os.Bundle;
import android.support.design.widget.FloatingActionButton;
import android.support.design.widget.Snackbar;
import android.support.v7.app.AppCompatActivity;
import android.support.v7.widget.Toolbar;
import android.view.View;
import android.widget.Button;
import android.widget.TextView;


public class Event2Activity extends AppCompatActivity {

    @Override    protected void onCreate(Bundle savedInstanceState) {
        super.onCreate(savedInstanceState);
        setContentView(R.layout.activity_event2);
        Toolbar toolbar = (Toolbar) findViewById(R.id.toolbar);
        setSupportActionBar(toolbar);

        FloatingActionButton fab = (FloatingActionButton) findViewById(R.id.fab);
        fab.setOnClickListener(new View.OnClickListener() {
            @Override            public void onClick(View view) {
                Snackbar.make(view, "Replace with your own action", Snackbar.LENGTH_LONG)
                        .setAction("Action", null).show();
            }
        });


        Button btnNewClick = (Button) findViewById(R.id.btmNewClick);
        btnNewClick.setOnClickListener(
                new Button.OnClickListener(){
                    public void onClick(View v){
                        TextView txtHello = (TextView) findViewById(R.id.txtHello);
                        txtHello.setText("Hello Shaneesh");
                    }
                }
        );

        btnNewClick.setOnLongClickListener(
                new Button.OnLongClickListener(){
                    public boolean onLongClick(View v){
                        TextView txtHello = (TextView) findViewById(R.id.txtHello);
                        txtHello.setText("Long Press Clicked!");
                        return true;
                    }
                }
        );
    }

}


Touch Mode

Users can interact with their devices by using hardware keys or buttons or touching the screen.Touching the screen puts the device into touch mode. The user can then interact with it by touching the on-screen virtual buttons, images, etc.You can check if the device is in touch mode by calling the View class’s isInTouchMode() method.


Saturday 2 July 2016

String Resources


String Resources


A string resource provides text strings for your application with optional text styling and formatting. There are three types of resources that can provide your application with strings
String
XML resource that provides a single string.
String Array
XML resource that provides an array of strings.
Quantity Strings (Plurals)
XML resource that carries different strings for pluralization.
All strings are capable of applying some styling markup and formatting arguments. For information about styling and formatting strings, see the section about Formatting and Styling.

String


A single string that can be referenced from the application or from other resource files (such as an XML layout).
FILE LOCATION:
res/values/filename.xml
The filename is arbitrary. The <string> element's name will be used as the resource ID.
COMPILED RESOURCE DATATYPE:
Resource pointer to a String.
RESOURCE REFERENCE:
In Java: R.string.string_name
In XML:@string/string_name
SYNTAX:
<?xml version="1.0" encoding="utf-8"?>
<resources>
    <string name="string_name">text_string</string>
</resources>
ELEMENTS:
<resources>
Required. This must be the root node.
No attributes.
<string>
A string, which can include styling tags. Beware that you must escape apostrophes and quotation marks. For more information about how to properly style and format your strings see Formatting and Styling, below.
attributes:
name
String. A name for the string. This name will be used as the resource ID.
EXAMPLE:
XML file saved at res/values/strings.xml:
<?xml version="1.0" encoding="utf-8"?>
<resources>
    <string name="logiclab">LogicLab Solutions</string>
</resources>
This layout XML applies a string to a View:
<TextView
    android:layout_width="fill_parent"
    android:layout_height="wrap_content"
    android:text="@string/logiclab" />
This application code retrieves a string:
String string = getString(R.string.logiclab);

String Array


An array of strings that can be referenced from the application.

FILE LOCATION:
res/values/filename.xml
The filename is arbitrary. The <string-array> element's name will be used as the resource ID.
COMPILED RESOURCE DATATYPE:
Resource pointer to an array of Strings.
RESOURCE REFERENCE:
In Java: R.array.string_array_name
SYNTAX:
<?xml version="1.0" encoding="utf-8"?>
<resources>
    <string-array name="string_array_name">
        <item>text_string</item>
    </string-array>
</resources>
ELEMENTS:
<resources>
Required. This must be the root node.
No attributes.
<string-array>
Defines an array of strings. Contains one or more <item> elements.
attributes:
name
String. A name for the array. This name will be used as the resource ID to reference the array.
<item>
A string, which can include styling tags. The value can be a reference to another string resource. Must be a child of a <string-array>element. Beware that you must escape apostrophes and quotation marks.
No attributes.
EXAMPLE:
XML file saved at res/values/strings.xml:
<?xml version="1.0" encoding="utf-8"?>
<resources>
    <string-array name="vehicle_array">
        <item>Bike</item>
        <item>Car</item>
        <item>Jeep</item>
        <item>Bus</item>
    </string-array>
</resources>
This application code retrieves a string array:
Resources res = getResources();
String[] planets = res.getStringArray(R.array.vehicle_array);

Quantity Strings (Plurals)


Android supports Plurals. Plurals are XML based resources which allow to handle different quantities. This way you can select the right text based on the quantity. In your XML file you specify values for the quantities “zero”, “one”, “two”, “many”, “few”, “many”, “other” and in your code you use the method getQuantityString() to get the correct value. You can also format strings. If now Strings are formated then you pass in the plural resources and the number. If Objects should be used for formating you pass them as additional parameters.

FILE LOCATION:


res/values/filename.xml
The filename is arbitrary. The <plurals> element's name will be used as the resource ID.
RESOURCE REFERENCE:
In Java: R.plurals.plural_name
SYNTAX:
<?xml version="1.0" encoding="utf-8"?>
<resources>
    <plurals
        name="plural_name">
        <item
            quantity=["zero" | "one" | "two" | "few" | "many" | "other"]
            >text_string</item>
    </plurals>
</resources>
ELEMENTS:
<resources>
Required. This must be the root node.
No attributes.
<plurals>
A collection of strings, of which, one string is provided depending on the amount of something. Contains one or more <item> elements.
attributes:
name
String. A name for the pair of strings. This name will be used as the resource ID.
<item>
A plural or singular string. The value can be a reference to another string resource. Must be a child of a <plurals> element. Beware that you must escape apostrophes and quotation marks.
attributes:
quantity
Keyword. A value indicating when this string should be used. Valid values, with non-exhaustive examples in parentheses:
ValueDescription
zeroWhen the language requires special treatment of the number 0 (as in Arabic).
oneWhen the language requires special treatment of numbers like one (as with the number 1 in English and most other languages; in Russian, any number ending in 1 but not ending in 11 is in this class).
twoWhen the language requires special treatment of numbers like two (as with 2 in Welsh, or 102 in Slovenian).
fewWhen the language requires special treatment of "small" numbers (as with 2, 3, and 4 in Czech; or numbers ending 2, 3, or 4 but not 12, 13, or 14 in Polish).
manyWhen the language requires special treatment of "large" numbers (as with numbers ending 11-99 in Maltese).
otherWhen the language does not require special treatment of the given quantity (as with all numbers in Chinese, or 42 in English).


EXAMPLE:


XML file saved at res/values/strings.xml:

we are going to use “Plurals” tag rather than “String” tag


<resources>
<plurals name="numberOfBooks">
<item quantity="one">%d book!</item>
<item quantity= "other">%d books!</item>
</plurals>
</resources>


This application code

int booksCount= 30;
String result = getResources().getQuantityString(R.plurals.numberOfBooks, booksCount,booksCount);
textView.setText(result);


result should be “30 books!”


Formatting and Styling


Escaping apostrophes and quotes


<string name="good_example">This is a \"good string\".</string>
<string name="good_example1">This\'ll work</string>

Formatting strings

Example

<string name="welcome_messages">Hello, %1$s! You have %2$d new messages.</string>

The format string has two arguments: %1$s is a string and %2$d is a decimal number.

Resources res = getResources();
String text = String.format(res.getString(R.string.welcome_messages), username, mailCount);


Styling with HTML markup


<resources>
    <string name="welcome">Welcome to <b>Android</b>!</string>
</resources>

Supported HTML elements include:
  • <b> for bold text.
  • <i> for italic text.
  • <u> for underline text.